Monday, December 29, 2014

The Ugly Table Makeover

Earlier I wrote about my recent love affair with chalk paint. As promised, here's a look at the newly transformed console table. It took on a whole new personality when it was treated to a couple of coats of turquoise blue chalk finish paint by Decoart!

This console table, a thrift store bargain at just $1.50, looks nothing like it used to.

I bought this table for just $1.50 at a thrift store. In its original state it was pretty darned hideous. Its dark stained finish was dull, battered and gouged. One side panel featured two faux drawers with pulls, but the single real drawer that belonged between the fake ones was missing altogether, leaving a gaping hole. In such bad condition it rightfully belonged in a landfill.


The thrift store manager seemed desperate to get this eyesore, tagged at $5.00, out of his inventory. He practically begged me to take it, offering to drop the price to $1.50 the moment I glanced in the table's direction. He stood there hopefully as I mulled this over. Despite its appearance, the table was reasonably solid. And all four legs were still intact. Hmmmm....So I pulled the $1.50 out of my purse and took possession of what was probably one of the ugliest pieces of furniture in North Georgia.

When I got it home, Hubs took one look, rolled his eyes in disbelief, and asked how much they had paid me to get it off their premises.

I should have taken a "before" picture and posted it but quite honestly I was embarrassed to, it was just that awful looking. And I was even more embarrassed to admit that after I brought it home, I placed it behind the sofa in the living room with every intention of starting the rehab right away. (Pigs would fly first. I should have known better.)

Meanwhile, I hid the worst of the blemishes on its surface with a big decorative birdcage and a pair of candlestick lamps. Positioned between the sofa and the wall, the table's faults were less noticeable. Whenever company was expected, I shrouded the whole thing under a table cloth and prayed our cats wouldn't stage a big reveal.

This, I am ashamed to say, went on for almost nine years.

Then last month, a dear friend contacted me to say she and her honey wanted to come visit us. That spurred the long-deferred renovation of a third bedroom-turned-junkroom. There wasn't time to shop for new furniture, so I decided to tackle the table makeover at the same time we painted the ceiling and walls and laid new flooring.

And so, with two coats of Decoart's chalk finish paint followed by two coats of satin varnish, the beat-up console table finally began its new life as a pretty and functional accent piece in our newly remodeled guestroom. There, it's on full display holding a lamp and other items. The side with the missing drawer faces the wall at present, but I'm hoping to persuade Hubs to replace it.

Like a pound rescue, the table has proven more than worthy of being given a second chance. Every time I look at it I'm really glad I bought it. It was a pretty good investment, I think.

Have you ever used chalk paint to rescue a thrift store find? How did it turn out? I'd LOVE to hear all about it!

Text and images ©2014 Lynn Edwards


Sunday, December 28, 2014

A Thought for Sunday, December 28, 2014

"One of the illusions of life is that the present hour is not the critical, decisive hour. Write it on your heart that every day is the best day of the year." -- Ralph Waldo Emerson

Sunday, December 21, 2014

A Thought for Sunday, December 21, 2014

"If you are yourself at peace, then there is at least some peace in the world. Then share your peace with everyone, and everyone will be at peace." -- Thomas Merton

Wednesday, December 17, 2014

Chalk One Up! I Love this New Paint!

A desire to update our massive, dark, ugly stone fireplace has led me to a great discovery: chalk paint! It started when I did an Internet search for ways to give a dated fireplace a new look. Short of having our fireplace torn out and replaced at a cost of several thousand dollars, I wanted something that would be (a) inexpensive, (b) relatively easy to do and (c) would be acceptable to Hubs. His typically masculine preference for decor that's dark and woodsy has frequently clashed with my preference for decor that's light, bright and white.

This photo of our fireplace at Christmastime was taken several years ago. The sheer scale of it and the huge expanse of dark stone overpowers the small room. Replacing this hulking monster simply isn't practical. Instead, I intend to apply a chalk paint wash in a light neutral color to lighten its appearance and integrate it visually with the rest of the decor.
I found the ideal solution when I came across a great tutorial on Erin Anderson's lovely blog. Erin treated her natural stone fireplace to a wash of Annie Sloan Chalk Paint mixed with water in a 1:3 ratio. Her now-updated fireplace has the same look I'm hoping to duplicate: lighter in tone, and refined rather than rustic.

My fireplace at present could be described as "Adirondack run amuck." It's 12 feet long, 8 feet high, and totally overwhelms its surroundings. It would fit right in at a hunting lodge, but in our house it's the proverbial elephant -- or should I say moose?? -- in the living room.

Anyway, when I saw the photos Erin posted of her fireplace makeover, I decided I just HAD to get my hands on some chalk paint. I had never heard of chalk paint before, but it intrigued me for several reasons. First, it needs NO prepping: no sanding, no primer, just a clean surface. The surface can be wood, metal, glass, ceramic, stone ... darned near anything. It yields a beautiful "soft" appearance, can be distressed if desired, and it comes in a wide range of decorator colors. It looked fantastic on Erin's fireplace. But before taking a plunge of similar magnitude I wanted to try it out on something small first, just to see what it was like to work with.

Annie Sloan Chalk Paint seems to be the best known brand, but at this time it's available in a limited number of retail locations and by mail order only. Being impatient, I didn't want to wait for a mail delivery, and I didn't have time to drive into the city to visit the nearest stockist, as retailers carrying the line are called.

Another Internet search led me to Decor Chalky Finish Paint from DecoArt Americana, which is sold at Hobby Lobby and a number of other retailers. So I promptly drove to a nearby Hobby Lobby and bought an 8 ounce jar of it in a beautiful turquoise color for $8.99. I have no way of comparing it to Annie Sloan's, but I'd like to give hers a try in the future.

My first try was on a wooden mug rack I found earlier this year in a thrift shop. The Decor formulation glided onto it as smooth as butter. It reminded me of painting with pastels, a medium often described as "sensual." Truly, this paint is sensual also. It delivered a wonderfully rich, matte appearance, transforming that nondescript mug rack into a good looking accent piece. Cleanup was a piece of cake: soap and water and done. Love it, love it, love it!

One 8 ounce jar of this stuff covers 60 square feet, according to the label. So now I'm painting a console table with it. I'm not done yet, but already I can tell my tired looking table is going to look sensational when it's finished. And after the holidays I'll take on the fireplace. Using a color other than turquoise, of course! :) So stay tuned -- I'll be posting pics soon.

©2014 Lynn Edwards

Sunday, December 14, 2014

A Thought for Sunday, December 14

"I still find each day too short for all the thoughts I want to think, all the walks I want to take, all the books I want to read, and all the friends I want to see. The longer I live, the more my mind dwells upon the beauty and the wonder of the world." -- John Burroughs

Saturday, December 13, 2014

A Super Fast, Super Easy Last Minute Gift Idea

Who doesn't need a quick and easy way to whip up a last minute holiday gift? Here's a great present you can make in minutes and spare yourself a trip to the mall:


These are original Artist Trading Cards which, when matted, will delight anyone on your gift list. Make some up for your childrens' teachers, your neighbors, your boss, your dog walker...or that impossible-to-buy-for person who has everything. They're suitable for everyone, and creating them is easy! Here's how:

Supplies needed:
Blank Artist Trading Cards
Found papers such as sheet music or dictionary pages
Color pencils
Acrylic matte medium or acrylic soft gel medium
Stamp pad with permanent archival ink in black or dark brown (black is shown here)
Rubber stamps with leaf designs
Iridescent gold acrylic paint
Stencil brush
8x10" mats  with openings sized for Artist Trading Cards

Step 1: 
Trim the found papers to the same size as the blank Artist Trading Cards.
Step 2: 
Using the matte medium or soft gel, adhere the found papers to the blank Artist Trading Cards. The found paper will be your background.
Step 3:
Apply ink to one of the rubber stamps and stamp the image onto one of the found paper backgrounds. Repeat, using the other stamp on the other background. Let the ink dry before proceeding.
Step 4:
Add colors to the leaves using the color pencils.
Step 5:
Load the stencil brush with a small amount of the iridescent gold paint. Dab off all but a tiny amount on a paper towel. Apply the remaining gold paint to the area surrounding the leaf images in a dabbing or pouncing motion using a very light touch. Allow to dry.
Step 6:
Insert each card into a mat (I buy mine from Jerry's Artarama) and you have a fine gift all ready to give!

Text and images © 2014 Lynn Edwards

Sunday, December 7, 2014

A Thought for Sunday, December 7, 2014

"Everything comes to us that belongs to us if we create the capacity to receive it." -- Rabindranath Tagore

Friday, December 5, 2014

Creating a Welcoming Holiday Entry on the Cheap

It has been crazy busy around here the past few weeks. With company from out of state arriving at Christmas, Hubs and I are racing against the clock to get the house in order.

Naturally we want our home to be nicely decorated for our guests' arrival. And that includes spiffing up the front porch. I already had a pair of wreaths and a door swag on hand in shades of silver, turquoise, lime green and magenta. (These colors work well with the house's body color and the blue-green front door.) I also had a pair of small artificial trees to position on each side of the front door. Hubs had strung white fairy lights in the trees several years ago but we had never decorated them beyond that. This time I wanted to decorate them to coordinate with the swag and wreaths, but I wanted to do it on the cheap!


The biggest problem with these trees was that their ugly, square plastic bases were 12 inches in diameter. That made it hard to find pots large enough to hold them that didn't cost the earth. None of the clay pots we had on hand were the right size. We looked at planters at Home Depot, which had some square ones at $15 each that would have worked, but I wasn't excited about spending $30 for them. Alternatively, I considered getting matching cardboard boxes and spray painting or wrapping them in decorative paper, but rejected the idea because the cardboard wouldn't have held up well if it rained or snowed.

Then Hubs discovered two old fruit baskets down in the basement. Turned out they were just the right size. All they needed was a coat of paint to make them look good. I handed him a can of Wal-Mart's el cheapo white spray paint -- it only runs about $3 per can -- and he went to work on the baskets. Bingo! (By the way, this paint is now my go-to for anything wood or metal, interior and exterior, that I want to paint white. It has a nice matte finish and it works GREAT!!!)

The next task was finding a way to anchor the trees so they wouldn't blow over in the wind. Two sacks of white marble chips at $3 each from Home Depot solved that problem nicely. We nestled an old 4 inch bed riser beneath each tree to support it, then filled in around the riser and up to the basket rim with the snowy white chips. The effect is perfect --- very "wintery!"


Next, a trip to Family Dollar and Big Lots yielded silver garlands, ornaments in silver, turquoise and lime green, and an assortment of lacy white snowflakes. All together they were $22. So including the marble chips, our total expenditure was a thrifty $11 per tree! Another plus: all the tree decorations are plastic, so they should last for years.

I think the baskets look so compatible with our farmhouse style home I've decided to leave them, minus the trees, in place year round. They'll make good supports for pots of ferns or flowers in the spring and summer, and I can display pumpkins and gourds on them in the fall. By tucking dried florist's moss in and around them to conceal the chips, the moss will give displays in those seasons a more earthy look. I can dress the baskets up even more by wrapping them with ribbon in seasonal colors, too.

Of course, the baskets will probably deteriorate over time, but even so, I figure that will take quite a while --several seasons at least. Meantime I'm so pleased with how this project turned out. We now have a welcoming holiday entry, and it cost hardly anything to create!

Text and images ©2014 Lynn Edwards

Sunday, November 30, 2014

A Thought for Sunday, November 30, 2014

"Kindness in words creates confidence, kindness in thinking creates profoundness, kindness in giving creates love." -- Lao-Tzu

Tuesday, November 25, 2014

Visiting the Udvar Hazy

A few weeks ago, Hubs and I made a trip to Virginia to see family. While we were there, we visited the Udvar Hazy Air and Space Museum near Dulles Airport, in Chantilly, Virginia. With thousands of items on view, this museum is an amazing place; we easily could have spent days exploring it. From aviation's earliest (and shockingly flimsy-looking) aircraft to modern space flight vehicles, from a propeller fragment from a Wright Bros. biplane to astronauts' clothing, toiletries and magnetized gameboards, the Udvar Hazy has it all.

Among the many things we saw in our short visit, here were just a few of my favorites:

The space shuttle Discovery is an awesome sight as you approach it

These beautiful, sparkly "umbrellas" are actually part of a satellite system.
It may look menacing, but this aircraft is used only for surveillance.
Recognize this? It's the "spacecraft" from the current hit film Interstellar starring Matthew McConaughey and Anne Hathaway
The "mother ship" used in the '70s movie Close Encounters of the Third Kind.
A side note: the Close Encounters "mother ship" is a study in fantasy as well as tongue-in-cheek humor. Its designers included a number of improbable items on the mother ship's highly complex exterior shell, all well camouflaged to blend in with its surface features. Look very, very closely and you might spy a mailbox, a VW bus, and a cemetery plot along with other commonplace things that are very much a part of life here on Earth.

As an artist, I've always been inspired by photos of outer space -- the dazzling beauty of nebulas, the planets, the Milky Way and of course views of Earth taken from manned spacecraft. Visiting the Udvar Hazy allowed me to see the technological side of space exploration. It gave me an even greater appreciation for the vision and courage of the men and women who are its pioneers. It was a wonderfully informative experience. Thanks to Udvar Hazy, I'll never look up at the stars in quite the same way again!

Text and images ©2014 Lynn Edwards

Monday, November 24, 2014

Oops!

Sometimes we can get so caught up in day to day events, we fail to remember our standing commitments. Such was the case this week, when I became (1) completely immersed in the renovation of our guest room and (2) totally captivated by my new Gelli Plate and the process of creating amazing monoprints with it. Oh, and there was also the five foot high pile of laundry I needed to tackle, along with starting the ritual of decorating the house for Christmas. (With company arriving from out of state, we're going all out on interior and exterior decorations this year.)

To make a long story short, I completely forgot to post yesterday's "Thought for Sunday." My bad!!!
When I realized my error, and acutely aware of Thanksgiving coming up later this week, I thought gratitude would make a good subject. Though "A Thought for Sunday" didn't appear on time, I hope you've still been able to derive some inspiration from it. Have a wonderful and blessed Thanksgiving!

©2014 Lynn Edwards

Sunday, November 23, 2014

A Thought for Sunday, November 23, 2014

"The private and personal blessings we enjoy, the blessings of immunity, safeguard, liberty, and integrity, deserve the thanksgiving of a whole life." -- Jeremy Taylor

Thursday, November 20, 2014

Using Aerial Perspective

An essential skill for artists, especially landscape artists, is being able to convey a sense of distance. This is achieved through the skillful use of aerial perspective, which comes down to this: features in the landscape closest to the viewer will appear darker in color and more saturated than those which are further away. Landscape features appear to become successively lighter in value and more neutralized the more distant they are. One of the best examples of aerial perspective is the appearance of mountains as they recede toward the horizon. Looking at them, their colors seem to become lighter and lighter and lighter the further away they are. Of course, their colors don't actually change, they only appear to do so.

What causes this? It's due to atmospheric conditions. Dust, air pollution, humidity and other environmental factors affect the way our eyes perceive elements in our physical environment.

Here's a photograph that helps illustrate "aerial perspective":

The Blue Ridge Mountains photographed from Interstate 81 in the Shenandoah Valley of Virginia. The photo was taken through the car windshield, hence the reflections to the immediate right and left. Despite the reflections, it's easy to see how the ridge lines vary in appearance depending on their proximity to the viewer.

Notice how the mountains and ridges on the horizon in the photo appear to be increasingly lighter in value and their colors increasingly neutralized the more distant they are. Those furthest away are almost the same color as the sky, while those in the foreground are several value levels darker and considerably more vivid.

Knowing how to create the illusion of distance is essential if you paint realistically. But it's very helpful for abstract artists to master as well. If you want to create a sense of depth, aerial perspective can be applied to abstract or non objective works just as effectively. For artists working abstractly, it may not be used as frequently as it is in realism, but for artists working in any discipline it's a very good thing to know.

Text and image ©2014 Lynn Edwards


Sunday, November 16, 2014

A Thought for Sunday, November 16, 2014

"Your time is limited, so don't waste it living someone else's life." -- Steve Jobs

Monday, November 10, 2014

An Art Destination in the Ozarks

Travel seems to be on my mind quite a lot these days. So I thought it might be fun to introduce you to some more delightful places Hubs and I have visited that are known for their charm as well as their focus on the arts. (I covered Santa Fe -- a totally amazing place -- in some posts back in October of 2013.) Today, I'd like to tell you about Eureka Springs, Arkansas, located in the beautiful Ozark Mountains in the northwest part of that state.

Eureka Springs is one of the most charming little towns I've ever encountered. Its entire downtown is on the National Register. Eureka's many Victorian homes are decked out in paint schemes ranging from dignified to quirky to flamboyant. Strolling through the town's  neighborhoods during warmer months you'll see lush gardens everywhere. This is a town decorated in flowers wherever you look.
This iconic building is situated in the heart of the downtown area.
 

Beauty both natural and handmade


One of the most appealing things about Eureka Springs' natural assets is its many springs emanating from the limestone formations upon which the town is built. One that we came upon in the midst of all the town's "painted ladies" was in a beautiful natural grotto thick with ferns and blossoms. Benches had been placed in strategic locations to allow passersby to stop and enjoy the sheer beauty of the site. It was so peaceful and lovely I could have stayed there all day.


But there are many other things to do in this town besides visiting its natural springs! One of them is immersing yourself in art. Both times we've visited we've spent lots of time wandering through all the interesting specialty shops and galleries in downtown Eureka. The vibe in ES is funky, laid back and fun -- exactly what you'd expect in a town boasting more than 400 artists as residents.

Fantasy & Stone offers colorful, eclectic art for both home and garden.


There are so many galleries in Eureka Springs it's impossible to visit them all in just a weekend. Two we especially enjoyed, among others, were Fusion Squared Gallery and Fantasy & Stone. At Fusion Squared we saw extraordinary fused glass jewelry, all designed by owner John Rinehart. His creations are positively dazzling.  

Across the street from Fusion Squared is Fantasy & Stone. Its owner is a delightful lady with an eye for art and decor pieces that are best described as quirky. It's all very colorful and light-hearted...the sort of eclectic artwork that makes you smile just looking at it. I was especially drawn to a display of large crystal suncatchers, any of which would have looked spectacular in a window or a garden.

If you stay in one of Eureka's many excellent bed and breakfast establishments, you'll encounter beauty there as well. On our last visit to Eureka Springs, we stayed at Red Bud Manor Inn, a B&B that's a work of art in itself. Everything from our room to the grounds to the breakfasts served up by our gracious innkeeper was picture perfect.

The cheerful front porch at Red Bud Manor Inn
Red Bud's hillside garden is a hidden jewel.


Entertainment that's out of the ordinary

There's plenty in Eureka Springs to admire and enjoy. Its downtown is easily walkable and retains all of its historic charm. Catch a concert or listen to street musicians in downtown's Basin Park, and enjoy hiking, boating, rafting, wildlife watching and canoeing. The surrounding mountains lure outdoor lovers, and at any given time there's likely to be a festival or special event taking place. (When we were there, it was a gathering of antique car lovers from all over the country.)

Where else but in Eureka Springs will you find a rabbit that hands you your receipt?


The gift shop's Most Valuable Employee

Eureka Springs is a very special place. Where else will you encounter a very friendly live rabbit that presents a gift shop's customers with their receipts? The cashier at Caroline's Collectables bags the merchandise and hands the receipt to the rabbit, who in turn gives it to the amazed customer. I'm sure many people make more purchases than they intended to, just to have a chance to interact with this furry little merchant. Another example of the many surprises to be found in Eureka Springs!

Text and images ©2014 Lynn Edwards


Sunday, November 9, 2014

A Thought for Sunday, November 9, 2014

"If you hear a voice within you say, 'You cannot paint," then by all means paint and that voice will be silenced." -- Pablo Picasso

Thursday, November 6, 2014

A Quick Tip for Cleaning Your Brushes

If you paint with acrylics, you know how hard it is to revive a nylon- or synthetic-bristle brush that was allowed to dry with paint still in the bristles. So it's important to clean your brushes thoroughly as soon as your painting session is finished. Here's a little secret: it's not necessary to use those pricey brush cleaners you see advertised in art supply catalogs. Instead, use Murphy Oil Soap, available at any grocery store. It costs a fraction of the price of those spendy cleaners, and a bottle of it will last for years.

Not only does this product do an excellent job at removing paint from the brush, it conditions the bristles at the same time. I've been using it to clean my brushes ever since I started painting. As a result I have brushes that still perform beautifully -- and look like new -- even now, 13 years after I bought them. They're my trusty workhorses; I paint with them all the time.

But wait! There's more! You can use Murphy Oil Soap to reclaim a dried out brush as well! (Obviously, the sooner you address the problem, the better. The longer you wait, the more difficult the job becomes.) Just suspend the brush over a small jar or other container filled with Murphy Oil Soap with the bristles fully submerged in the soap. It may take days of dangling in the soap for the bristles to become supple again, depending on the size of the brush and how much paint is on it. But eventually they'll soften enough to where you can work the paint particles out and rinse them away.

This rescue technique also works on house painting brushes caked with dried on latex paint. It just calls for a bigger container and a lot more Murphys.

©2014 Lynn Edwards

Tuesday, November 4, 2014

A Holiday Recipe That's Artist-Worthy

The holidays are almost upon us, so today I thought I'd share a favorite family recipe with you. If you and your clan love fruit, you're in for a treat if you make this. It's not only wonderfully colorful (is there such a thing as culinary eye candy??) it tastes great and compliments any holiday menu, from turkey, cornish  game hen and pork roast to ham and beef. It goes together in a hurry, feeds a crowd, and can be made ahead, too.

Baked Fruit

(1) 20 oz. can of prune plums or prunes
(1) 20 oz. can of pears
(1) 20 oz. can of chunk pineapple
(1) 20 oz. can of apricots
(1) 20 oz. can of sliced peaches
_______________________

(1) 20 oz. can sweet cherry pie filling
_______________________
1/4 cup butter or margarine
1/2 cup of brown sugar
1/4 cup sherry
3/4 cup reserved juice 

Grease a 13x10 1/2 inch glass baking dish with butter or margarine. Drain and reserve juice from the fruit. Place the fruit in the baking dish and mix together gently. Top with the cherry pie filling. 

In a small saucepan, over medium-low heat, stir together the butter, brown sugar, sherry and reserved juice.  (Make sure it doesn't scorch!) Pour this mixture over the fruit. Bake uncovered at 350 degrees for 35 to 45 minutes. Serves 8-10 people. This recipe makes a good side dish. It also serves as a dessert when topped with ice cream.

PS -- If you can't find 20 oz. cans, just buy the largest size available. I suggest you not wait until the last minute to shop for the canned fruit; it usually sells out fast.

Sunday, November 2, 2014

A Thought for Sunday, November 2, 2014

"I've learned that people will forget what you said, people will forget what you did, but people will never forget how you made them feel." -- Maya Angelou

Thursday, October 30, 2014

Art on the Road: How to Create While Traveling

If you're like me, you love traveling to new places but dislike having to spend time away from your studio. Especially if the trip calls for you to be gone for several days or even weeks. It can seem like an eternity before you're able to return home to the studio and resume your usual routine. In the past I'd practically experience separation anxiety when I was on the road. Yearning to be at home with my paints and papers sometimes came dangerously close to overriding the happy experiences that traveling yielded.

Here I'm checking out a local newspaper while on a trip to North Carolina. Words pulled from headlines often make good collage fodder

Traveling light


Forget about lugging paints, brushes and canvases through airports, hoping airport security personnel will know enough about the nature of art supplies to refrain from detaining you. With nothing more than a few items small enough to fit into a purse or pocket, I've discovered how to remain in tune with my Inner Creative Child while living out of a suitcase!

No matter where we go, it's possible to make mini collages, while packing nothing more than a glue stick, a few pens or color pencils and a 6x8 inch pad of 140# watercolor paper.

Watercolor paper makes a good collage substrate. And there's no need to use gesso. Just apply the glue stick to the back of your collage papers, and press them down onto the surface of the watercolor paper. Nor do you need scissors if you're willing to tear your collage papers rather than cut them. Vary the look of the edges by tearing the papers toward yourself as well as away from yourself.

"What collage papers??" you ask. "You didn't mention packing collage papers!!!"

Here's the good news. You don't need to. Wherever you go there's a wealth of collage material all around you. Below are just a few sources available to on-the-go artists. Because many are likely to be copyright protected, artwork made with them should not be offered for sale or used for commercial purposes. Such collages are to serve as personal creative exercises only!

Consider the source(s)

That said, here are 10 places to find collage papers when you're away on vacation or traveling for business:

1. Roadside welcome centers offer hundreds of colorful travel brochures for the taking, as well as road maps.

2. Restaurants are usually happy to give you their menu if you ask for one.

3. Many hotels and inns provide their guests with free newspapers.

4. Ticket stubs can be used if you take in a play or concert, visit a museum or attend a sporting event.

5. Ditto for printed programs and seating charts these venues may provide.

6. If you attend religious services while traveling, don't overlook take-away materials such as Sunday bulletins.

7. Free magazines and circulars are commonly offered in racks at entrances to shops and restaurants.

8. Boutiques and specialty shops often have attractive graphics or patterns on their shopping bags.

9. If you like the grunge look, curbs and sidewalks can be great places to score interesting bits of paper litter. The same holds true for parking lots.

10. Stopping to buy snacks at convenience stores and gas stations can yield colorful candy wrappers and other useful packaging, provided they're not greasy or waxy. Bonus: you get to eat the contents!

As you can see, there's no reason to leave your creativity at home when you hit the road. You'll be so much happier, and get more enjoyment from your travels, if you take a few art supplies with you. So don't leave home without them!

©2014 Lynn Edwards


Saturday, October 25, 2014

A Thought for Sunday, October 26, 2014

"The universe is full of magical things, patiently waiting for our wits to grow sharper." -- Eden Phillpotts

Friday, October 24, 2014

Another Paper Mosaic Mirror!

Back on June 25, I wrote about creating a paper mosaic mirror. That design featured paper strips that were one inch wide, and were composed mostly of blues, greens and purples.


The original paper mosaic mirror, completed back in June.

Earlier this week, I noticed I had amassed quite a few handpainted scraps left over from larger projects -- enough to make another mirror. But most of these scraps were really, really small --- nowhere near the size of those on mirror #1. Undeterred, I lightly sanded another Ikea mirror to give its surface some "tooth," and plunged in.

The five day mirror in its almost-done state. All that's necessary to finish it is a bit of trimming, then sealing and varnishing.


It soon became obvious this project was going to take more time than the first one. Much more time. The little papers were so much harder to pick up with my fingers or tweezers, and gluing each one down was equally tedious. But still it was an enjoyable process, though there were countless frustrating moments as a paper would escape my grasp and land -- fully loaded with glue -- someplace it wasn't supposed to.

Five Days and Counting...

Not including the time allowed for drying, this second mirror took five days to make. Insane, I know. Whenever someone asks me how long it takes me to make something I never know how to answer. There's the planning time, the prep time (painting and embellishing papers, preparing the substrate by applying multiple coats of gesso and sanding between each coat, etc. etc.)  But those tasks are usually just the tip of the iceberg.

Accounting for the Intangibles

Do we count the 3 a.m. brainstorm on a sleepless night that sends us rummaging through old journals, searching for an obscure entry that's essential to our project? Do we factor in the hours, months or years we've spent in classes and workshops honing our skills? Do we include the time we've invested surveying the work of other artists so that it can inform and inspire us? The time spent driving to and from the art supply store to buy our canvases and paints? How do we account for these and countless other factors that contribute to our making a finished piece of art?

I suspect the question is asked so that the inquirer can get some sense of how much the item will cost, and allow them to make a value determination. But there's really no way an artist can provide a concise answer because so much of what we artists do lies well outside the realm of timeclocks and 40 hour work weeks.

Coming up with a fair and reasonable price is like herding cats. It's possible, but it's not easy. After getting out my calculator and crunching the numbers, I learn I should be charging $5,345.00 for mirror #2. Sounds good to me! So step right up, my friends! All major credit cards accepted!

Text and images ©2014 Lynn Edwards

The Poured Painting: Dealing with Rough Edges


Something I forgot to mention in my previous post was the problem I encountered trying to pull the blue painter's tape off the sides of the MDF. Instead of pulling off cleanly, it remained firmly stuck to the MDF wherever pouring medium had seeped through it. I was able to remove some of the tape but about half of it refused to budge. I then tried to sand it off by hand. Still no go.
Rough edges and stubborn tape remnants pose an aesthetic problem

Oops...!

Thinking that just maybe the whole messy business would look better painted over, I applied a coat of Cobalt Teal, an opaque color I had also used in the pour. Well, that turned out to be the equivalent of putting lipstick on a pig, to quote Sarah Palin. The color was nice but the tape remnants still showed through and still looked awful.

So what to do next? I could have taken a sander to it but frankly that idea didn't work for me at all. All that dust....yuck. Besides, it would require a trip down to the basement to find the sander, hunt up more sandpaper, and figure out a way to clamp the painting down while I performed the surgery. Not my idea of fun.

Much better, don't you agree?


After mulling the problem over some more, I came up with this: just cover up all four sides with strips of painted butcher paper. (I've done this using artist's tissue in the past, but tissue does tend to show any imperfections in the MDF.) The butcher paper would camouflage both the rough MDF and the tape, resulting in a nice smooth finish. With careful measuring and cutting I could butt the paper strips together at the corners -- no mitering needed. So that's what I did and it turned out fine. I used two coats of Cobalt Teal on the butcher paper, measured and cut out four 3/4 inch wide strips, and adhered them to the sides of the MDF with Yes!Paste. Easy peasy. I liked the result so much I'll use this treatment on all MDF panels in the future.

And you can be assured that next time I do a pour, I'll seal the edges where the tape "wall" meets the surface of the MDF panel with acrylic gel medium before I do any pouring. The gel medium should keep the pouring medium from penetrating into the tape. I'm not sure I'll use painter's tape again, either. I'm thinking duct tape might be a better choice. And next time I'll use gel medium to glue the paper strips to the sides of the MDF. (Yes!Paste was just a little too messy.) This project was intended to be a learning experience...and it taught me quite a lot!

Text and images ©2014 Lynn Edwards

Sunday, October 19, 2014

A Thought for Sunday, October 19, 2014

"To add a library to a house is to give that house a soul." -- Cicero

Friday, October 17, 2014

My First Pour: The Final Results

After tweaking and tweaking some more, my first poured painting went from this:
Too much green!


To this:
I'm happier with it now that some of that green has been covered over.


These closeups show how many more colors were added to reduce the excessive amount of green:


 Golden Polymer Medium vs. Liquitex Pouring Medium

After the first pour, made with Golden's Polymer Medium (Gloss), I decided to switch to Liquitex's Pouring Medium just to see if there was any noticeable difference. And there was. While the polymer medium produced an incredibly deep layer with a "surfboard shine," crevices appeared on the surface as it dried. While some folks might find these to be acceptable, they bothered me.

So for subsequent layers I switched to mixing my fluid acrylics with Liquitex Pouring Medium. This product produced a smoother surface but it didn't have quite the ultra shiny finish I was hoping for. It was glossy but not quite as glossy as the polymer medium.

Now, it's entirely possible the age of my bottle of pouring medium may have had something to do with it. It was already several years old when I opened it the other day for the first time. I plan to buy another bottle to see whether fresh Liquitex Pouring Medium, used for pouring all of the layers, will produce different results. So the experimentation continues. And that's what's so much fun, in my opinion.

If you've poured acrylics, I'd love to hear what your preferred mediums are and what techniques work best for you. Do you pour on canvas, or do rigid substrates work better for you? Do you use fluid acrylics, or heavier bodied paints? To share your views, just click the Comments link below.


Tuesday, October 14, 2014

Seeing Possibilities in the Mundane: Altering Photos for Art Use

Recently I was sitting on a beautiful deck shaded by a canopy of trees. I couldn't help but notice the intriguing patterns the sunlight was casting all around me. Then I began to look really closely at other features in this idyllic spot -- the rough bark of the trees, the pebbled surface of the concrete path leading to the deck, and the "toothlike" appearance of the wooden steps across from where I was sitting. Thinking I'd like to add some photos to my inspiration file, which I like to tap for collage elements and painting ideas, I grabbed my camera to capture these humble subjects before the light shifted.

Here's a small sampling of what I ended up with:

An ordinary tree trunk
Rotated sideways and altered in Photoshop it becomes a textural element for a collage
Rotated in the opposite direction and colorized, it might be the basis for a future abstract painting
Shadows where a vertical wall met the concrete sidewalk
Changing its color and exaggerating the saturation results in something quite different!.
Ordinary wood steps on the deck
Those same steps look more interesting now, don't they?
I really liked this pattern on the patio lantern.
Photoshop turned it into something quite dramatic.

Playing with the color and saturation levels introduces a whole new look entirely.

Even if you don't have access to a photo editing program you can still take pictures that can inspire you, be used as image transfers, or be altered manually. With digital photography the sky's the limit! An indispensable guide to dozens of techniques for altering photos is Image Art Workshop: Creative Ways to Embellish and Enhance Photographic Images by Paula Guhin. It's a go-to resource for me. You can check out Paula's blog, Mixed Media Manic, by clicking on the link in my blog list. I think you'll enjoy it as much as I do.

A quick update on my pouring experiment, described in my previous blog post:


I'm still tinkering with the painting. I think I'm done messing with it now, but I need to go back and clean up the edges where I put blue painter's tape. Overall, I'm happy with the way it looks, but I need more practice with pouring. As soon as I make it presentable (!!) I'll post a photo, probably toward the end of this week.

Text and images ©2014 Lynn Edwards

Thursday, October 9, 2014

It's Pouring!

Once in a while it's fun to try something that's waaay out of your creative comfort zone. Inspired by an article by Mary Beth Shaw in the latest issue of Somerset Studio, yesterday I decided to try my hand at pouring acrylics.

Oh wow! I think I'm hooked!

A closeup view of  one section of the painting.


Per Mary Beth's instructions to use a rigid substrate, I used a gessoed-and-sanded piece of MDF measuring roughly 8x8 inches. Although her instructions didn't call for it, I created a "wall" around the outside edges of the MDF with blue painter's tape to help contain the paint and medium.

After laying down a large piece of freezer paper to protect my work surface, I poured a good sized puddle of acrylic polymer medium gloss in the middle of the MDF panel. Next I placed a few drops of fluid acrylics and acrylic inks in various colors into the polymer medium. Then the fun began.

It's all in the moves......

By tilting and moving the panel in a circular fashion, the pigments suspended in the polymer medium started to shift and blend, as the medium began to slide around on the surface, kind of like a colorful, miniature tsunami. Pthalo Turquoise merged with Hansa Yellow, forming brilliant greens that whorled and swirled in a dazzling tapestry of patterns. Quinacridone Magenta encountered ripples of Hansa Yellow, producing a vivid melon color that reminded me of a sunset I saw once on Tybee Island. Cobalt Teal, Titanium White and Ultramarine Blue joined in, as the polymer medium carried them across the MDF in all directions, blending and combining them all into fascinating shapes and hues. Yowza!

Still very wet, this is how the painting looked when I called it quits for the day. I think there's too much green, so I'll let the whole thing dry, then I'll cover up some of the green by pouring another layer of contrasting colors over it. The "white" areas near the upper right- and left-hand corners are actually reflections on the ultra glossy surface.


When I finish the piece shown above, I'll post a photo of it here on the blog.

What I learned:

While creating this piece, I learned a few things:

1. Wear gloves. Or use a barrier lotion. (I failed to do either one and spent 30 minutes trying to get dried paint and medium off my hands and arms.) Pouring is unbelievably messy!!!

2. Test the viscosity of the gloss medium on a piece of scrap before applying it to your substrate.The first layer I poured was a little too thick. It didn't move as readily as it should have, so for the second layer I added a small amount of water to the polymer medium. That made all the difference.

3. Ensure your work table is dead level before you start pouring. This is a must. If you don't have a carpenter's level, a glass of water will suffice. Make needed adjustments by slipping scraps of matboard under the table legs.

4. Don't rush the process. Allow ample time for each layer to dry completely before proceeding further. In our humid climate, letting each layer dry overnight isn't too long.

5. Start small. Six by six, 8x10 and other small substrate sizes are ideal. Pouring is an acquired skill -- the learning curve is easier to master on a smaller scale. Failed paintings can be used, too.


Talk about having fun...pouring acrylics is pure joy. If you want to be entranced and amazed, I hope you'll grab some gloss medium and give it a try!

Text and images ©2014 Lynn Edwards

Sunday, October 5, 2014

A Thought for Sunday, October 5, 2014

"One difference between savagery and civilization is a little courtesy. There's no telling what a lot of courtesy would do." -- Cullen Hightower

Tuesday, September 30, 2014

Falling in Love With Fall

Fall is in the air. Have you noticed the change in the light? The subtle color shift in the dogwoods as their leaves begin their transition from green to copper? The stacks of pumpkins now appearing in stores and markets? After the heat and humidity of our long Georgia summer, I embrace these welcome signs of Autumn. It's my absolute favorite season! So I thought I'd treat my readers to a few photos I've taken in years past, just to whet your appetite for the beauty that's almost upon us. Enjoy!

©2014 Lynn Edwards
©2014 Lynn Edwards
©2014 Lynn Edwards
©2014 Lynn Edwards


Sunday, September 28, 2014

A Thought for Sunday, September 28, 2014

"The greatest dangers to liberty lurk in insidious encroachment by men of zeal, well meaning but without understanding." -- Louis D. Brandeis

Wednesday, September 24, 2014

How to Get Your Collage to Lay Flat

Watercolor paper that's 140 pounds or heavier is an excellent substrate for collages, but it does have a tendency to buckle or curl when subjected to multiple layers of paper and medium. This can make matting a finished piece a bit challenging. Fortunately, there's a simple way to overcome this problem. Here's the method I use to get my non-dimensional collages to lay perfectly flat:

1. Lay a piece of freezer paper down on a clean, flat surface, with the waxy or shiny side facing up.

2. Place your collage face down on the freezer paper.

3. Using a spray bottle, lightly spritz the back of the collage with clean water. (Do not soak your collage!)

4. Cover the collage with a second sheet of freezer paper, with the waxy or shiny side facing down.

5. Place a sheet of plywood on top of the freezer paper, making sure all parts of the collage are covered by the plywood.

6. Set a heavy weight on top of the plywood. (I use a stack of books, but you could also use bricks or a bucket of water.)

7. Leave the whole thing undisturbed overnight, then remove the collage. It will now be nice and flat, and ready to be matted.

For very small collages, 5x7 inches in size or less, it's not necessary to use the plywood. Simply place the stack of books directly on top of the freezer paper.


Sunday, September 21, 2014

A Thought for Sunday, September 21, 2014

"We are all, it seems, saving ourselves for the senior prom. But many of us forget that somewhere along the way we must learn to dance." -- Alan Harrington

Friday, September 19, 2014

Creating and Maximizing Collages

The past few weeks have been super busy. I've been working a lot on jewelry, mostly on domino pendants, as well as a special order for some mosaic earrings. So far I've completed 24 domino pendants. I haven't photographed any of them yet, but I did photograph the earrings before I shipped them to the buyer.

The earrings have designs on both sides so something pretty is always visible while they're being worn. Here's a view of one side:

©2014 Lynn Edwards

Another project was this mini collage, pictured below. It came about somewhat serendipitously. I was fooling around with some painted scraps, placing them side by side just to see how they looked together, when a design began to emerge.

"Auditioning" various papers to see how they look next to each other is an intrinsic part of the collage process. It's one of the most enjoyable, too.

About two dozen individual pieces of paper form the collage. As you can see, only half of the papers in the photo above became part of the finished work. Evaluating what works and what doesn't, what enhances and what detracts, is what makes collage so much fun to do.
©2014 Lynn Edwards
I'll be offering this mini-collage in my Etsy shop next month as I stock my shop for the holidays. Wouldn't this make a sweet little addition to someone's office cubicle? At 3x4 inches it's original fine art -- in miniature!

I've also been creating 6x8 inch freeform collages on watercolor paper. My plan is to turn these into greeting cards. Looking them over, it occurred to me that by cutting them in half, each would fit nicely on a blank greeting card if a slightly larger piece of colored card stock was inserted beneath the collage.

As luck would have it, all of them looked just fine when cut in two -- no compositional adjustments needed. So six 6x8 inch collages yielded a dozen 3x4 inch pieces. To get even more mileage from them I'll scan them so I can use portions of these images in future works. When I photograph the domino pendants I'll photograph the cards and will eventually post pics of all. But for now these photos of the earrings and the mini-collage will have to do.

Text and images ©2014 Lynn Edwards

Monday, September 15, 2014

A Great New Find: Marietta Reclamation

If you're an artist, chances are you enjoy putting your own unique stamp on your home's decor as much as you enjoy expressing yourself on canvas. If you're like me, you love poking around in thrift stores and yard sales. They're often great sources for items that can be revived and given new life with a bit of paint and elbow grease.

The thrill of the hunt

I've found all kinds of treasures at these places. And I visit them regularly, always on the prowl for something that fits in with the look I want for my home -- probably best described as Quirky Eclectic with a touch of Shabby Chic .

So when my friend Pat lured me away from the studio recently with the suggestion that we go check out a new architectural salvage company in Marietta, I could hardly contain my excitement. I positively adore architectural salvage companies (oh, the many uses for all those magnificent old doors, corbels, pediments and light fixtures...!!!)

Salvage Salivation Syndrome

When we walked through the door of Marietta Reclamation, I thought I had died and gone to heaven. Before I could remove my sunglasses I had spotted at least half a dozen items that would look sensational in my house and on my porch. Unless I exercised extreme self-control, I was in danger of impoverishing myself in under 10 minutes.

A massive pine drafting table immediately caught my eye. Good thing my studio is too small to accommodate such a substantial piece, but oh, how readily I envisioned myself as its new owner. Dozens of marble slabs, many of which had gorgeous colors and patterns, also grabbed my attention. Now I know where to get a slab to use as the top for the potting bench I've always wanted.

Had I been looking for old doors, I'd have had plenty to choose from, in every size and style. Old doors can be turned into so many useful things -- tables, room dividers, headboards. Oh yes, I will definitely consider turning one of them into a headboard for the bed in the guest room. Beyond the doors I saw columns that would have been gracious additions to my entryway. Heck, just standing one up in a corner of the living room would be such an eye-catching accent...! And that planter made with salvaged wood? I could just see it on the corner of my front porch, spilling over with cheerful red geraniums.

Yes indeed, my brain is constantly whirling with images straight from the pages of This Old House, Southern Living and HGTV Magazine. My home isn't big enough to contain all the projects I want to do, but that doesn't stop me from dreaming and drooling over what I see in these magazines. I want it all. I want my house to look like all of those houses. I think I might need an intervention.

Uh-oh, there goes my willpower

These shutters from Marietta Reclamation will soon become a part of my home's decor. To the right are a garden topiary and an old wrought iron patio table, both thrift store finds.    Image ©2014 Lynn Edwards


When I got to the shutters, my resolve crumbled. I have a thing for shutters. And sitting right there was a pair of chippy painted vintage shutters perfect for flanking a mirror over my mantel. I had envisioned them in my mind's eye for years, and here they were. I just had to have those shutters. Pat and I measured them and I called Hubs to see if they'd fit. Yes, they would. The price was more than reasonable for their size ($43 for the pair, each of which measures 41x16 inches), and they were in great shape to boot. SOLD!!! Those babies were going home with me to start their new life in the Edwards' hacienda.


If you're into architectural salvage, you'll love exploring Marietta Reclamation. It's tucked away just south of the Square at 52-B Powder Springs Street, just a few doors down from the Murray House.You may have to drive around the block a time or two to get a parking space, but it's worth the effort. (Call 404-556-3127 for store hours; at present they're open on Thursday, Friday and Saturday only.) Owners Deanie and Gordon Brans offer an inventory that offers plenty of dream fodder. So much to see, so many possibilities! Bring your wish list -- you're guaranteed to find something here that brings your decorating dreams to life.

 Text and image ©2014 Lynn Edwards


Sunday, September 14, 2014

A Thought for Sunday, September 14, 2014

"No matter how small and unimportant what we are doing may seem, if we do it well, it may soon become the step that will lead us to better things." -- Channing Pollock

Tuesday, September 9, 2014

Seducing the Muse: Regaining Your Motivation and Overcoming a Creative Block

Every artist I know, myself included, experiences a creative "drought" from time to time. You know the symptoms: you wake up in the morning without any inclination to go into your studio. You worry that you'll never have another creative thought in your life. When you do manage to get to your easel, the sight of the blank canvas seems to paralyze your brain. You stare at the white expanse for an hour, at a total loss for what to do with it, then set it aside, untouched. You spend inordinate amounts of time on tasks that aren't art-related, telling yourself you'll "get around" to painting/drawing/sculpting/carving etc. just as soon as you've done the laundry, called your mother, mowed the lawn or cleaned out the linen closet. All the while, you're beating yourself up mentally for not being creative or productive. You feel inadequate, anxious, and guilty. You feel utterly miserable.

This, too, shall pass.

Believe it or not, this dark cloud that has settled over you can be banished. It can actually be turned into a benefit -- if you're willing to look at things through a slightly different lens.

The first step to getting rid of it is to embrace it. (Yes, you read that correctly.)

A "creative drought" is often a prelude to a period of sustained creativity. But to get there, you must sometimes walk through a dark valley, so to speak. The landscape in this valley is fraught with depressing thoughts and self-doubt. It's where our deepest fears and insecurities lurk. Oddly enough, it's also where you can make tremendous strides in your artistic practice if you can accept that this gloomy state is temporary. You have the power and the ability not only to end it, but also to gain from it.

I believe a creative block is our psyche's way of seeking release from the relentless pressure we put on ourselves to produce, produce, produce. In my experience, a period of being blocked sometimes follows a very demanding period in which we've worked feverishly preparing for a major exhibition, completing a significant but mentally exhausting commission, or channeling all of our creative energies toward peripheral activities that produce revenue but leave us little or no time for making our art.

A creative block can also occur when you've been faced with a deeply distressing personal crisis such as the loss of a parent, child or spouse, dealing with a serious illness, losing your home or losing your job.

No matter what triggers it, I'm convinced a creative block is the response to intense mental or emotional pressure whose source is either internal or external. The mind and temperament can only handle so much. At some point as stress and tensions build, something's got to give. Usually it's the desire and will to make art. At this point the Muse simply throws up her hands, screams, "I'm done! I quit!" and stomps out.

So what can we do to regain the sense of joy and excitement found in creative expression? To once again look forward with eagerness to working in the studio? To find our way out of the dark valley?

We must "seduce" our Muse. We do this not by forcing a creative assignment upon her, but by gently coaxing her to come out and play. The idea is to focus not on projects or results, but only on enjoyable diversions. We allow ourselves to play, with no thoughts whatsoever of outcomes, sales, completing projects or creating masterpieces. Instead, we pursue many interesting, fun, intriguing things we've always wanted to explore but never allowed time for. This can include activities or interests that do not relate directly to our artistic discipline, but which nonetheless are creatively satisfying in their own right. Below are a few strategies that have been used successfully by artists I've known, including some I've used myself. Maybe they'll also help you.

Seven Ways to Seduce One's Muse:

1. Have you ever thought of collecting fabric scraps to use for color inspiration? Gift yourself with an afternoon of browsing a fabric store. Bring a notebook to jot down color combos you find appealing. Look for fabric remnants or trims with textural patterns. Could these be turned into stamps? Used in future mixed media pieces?

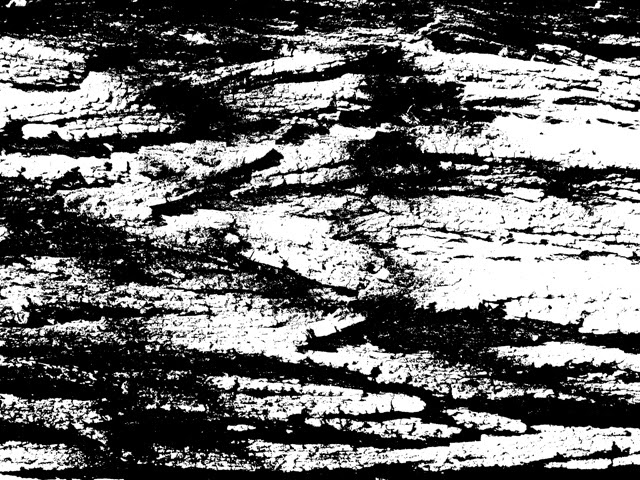
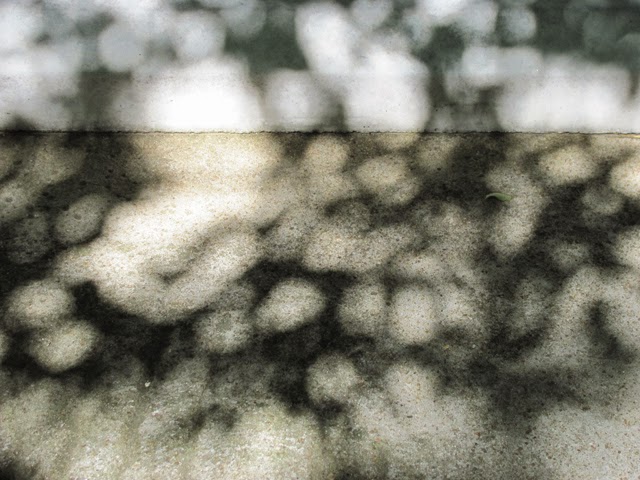
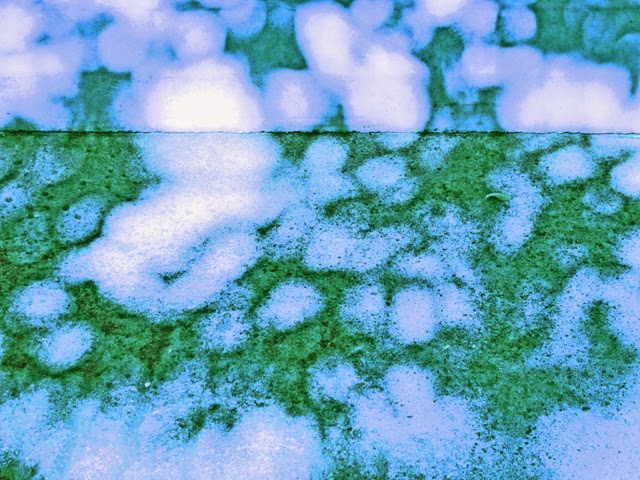
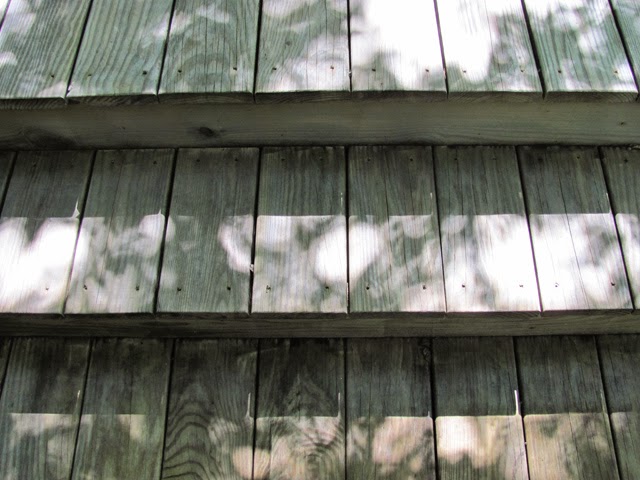
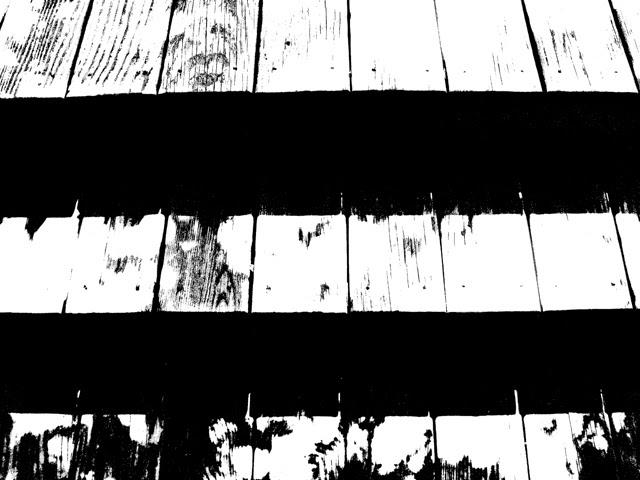
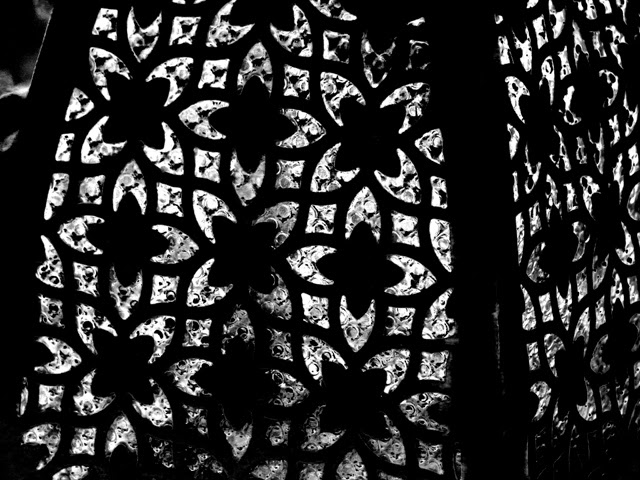
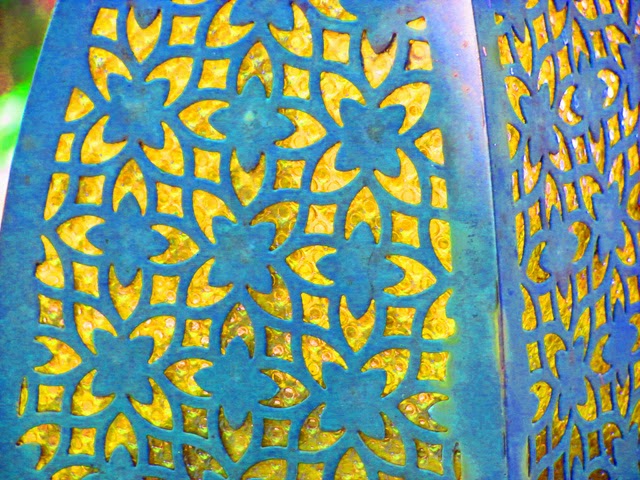
2. Treat yourself to a photography field trip. Go to a park and shoot different kinds of tree bark. Walk through a historic neighborhood capturing interesting architectural features. Make a photographic study of parking meters. Or pigeons. Or people sitting in outdoor cafes. Use the resulting shots as reference photos or work them directly into future pieces.

3. Hold an artist's swap meet. Invite some fellow artists to bring art supplies they no longer use or want, serve up some wine and cheese, and trade goodies with one another. You'll come away from it with new materials to try and lots of helpful insights, too.

4. Reorganize your studio. Tidying up your workspace literally makes room for new ideas and inspirations. In the process you'll unearth long-forgotten supplies that could help rekindle your creative spark. Rearrange all the furniture for even more excitement. This simple act can give you a whole new perspective. It can be almost as exhilarating as moving into a brand new studio.

5. Hold a Turkey Party. Turkeys are those less-than-wonderful paintings, abandoned starts and other "failed" pieces you've been hiding under the bed. Invite a group of trusted, supportive artist friends to bring turkeys of their own, along with some paints, collage papers, and other supplies. Have everyone swap their turkeys for someone else's. Then set about developing each turkey into something new. You'll enjoy plenty of laughs as you come to see that we all produce turkeys, and that when we do, it's not the end of the world. Turning those ugly ducklings into swans (or simply into something different) can reawaken your creative energies while strengthening the bonds you share with other artists. Note: invite only those friends whom you know to have one another's best interests at heart. This event is not suitable for one-upper types on ego trips!

6. Do Zentangles. This art form -- similar to doodling but managing to be both meditative and engaging -- is highly therapeutic for artists who are blocked. Many such individuals say making Zentangles enabled them to overcome creative inertia as it calmed their fears and anxieties. All you need is a pen and paper to get started. Zentangle resources abound on the Internet.

Doing Zentangles is both meditative and calming. This Zentangle is titled "Peacock." ©2014 Lynn Edwards


7. Read The War of Art by Steven Pressfield. A copy of this book should be on every artist's bookshelf. It is THE go-to guide for creatives experiencing all forms and degrees of artistic constipation. It's not a complicated read, but it's profound in its analysis of the condition and dead on in its suggestions for solutions.

Have you struggled to overcome creative blocks? This problem seems to affect artists in every culture and era and at every level. For some it persists for weeks or months, for others, years. What are your thoughts on it? Your own experiences with it? Do you think it's a legitimate condition, or just an exaggerated form of procrastination? Let's hear your thoughts!

©2014 Lynn Edwards