 |
| A basic painted paper bead |
Let's get started!
Your first step is to gather the materials. To make one bead you'll need:
(1) piece of plain white lightweight paper such as photocopy paper
(1) piece of white cardstock
Permanent black ink pad
Rubber stamp with small-scale design (Mine is from Judikins)
Toothpick
Bead roller (mine was purchased on Etsy)
X-acto knife and cutting mat OR scissors and paper cutter
Ruler
Glue (I use WeldBond Glue but Yes!Glue, Elmer's Original Glue or acrylic soft gel can also be used)
Small flat paintbrushes, 1/4" wide and 1/8" wide
Masking tape
Iridescent Silver acrylic paint
Carbon Black acrylic paint
Gloss acrylic varnish
Instructions:
Make the base bead
1. Using the paper cutter, or the X-acto knife and a cutting mat, cut a 3/4" wide strip of paper from the piece of white cardstock: |
| I used a Fiskar paper cutter to trim off a 3/4" wide strip which forms the base bead. |
3. Place one short end of the 7 1/2" strip into the slot on the bead roller. Make one or two turns with the roller, keeping the edges of the cardstock aligned.
4. Place a drop of glue on the cardstock to secure the paper. Roll the bead into a tight cylinder, using additional drops of glue every now and then as you roll to secure it.
 |
| Keep the edges of the cardstock aligned as you roll the base bead. |
 |
| A base bead finished and ready for a layer of painted paper. |
Make the painted paper.
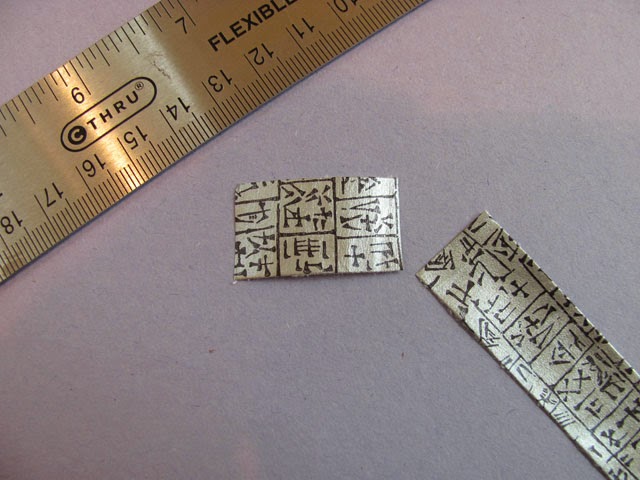
1. Using the Iridescent Silver acrylic paint, apply a coat or two to one side of the photocopy paper. Make sure your coverage is even and there are no streaks. Allow to dry thoroughly. (Depending on how many beads you plan to make, you can cut the photocopy paper down to a smaller size before painting it. The piece I used, shown here, is about 6x6".)
2. When the paint is dry, stamp your design onto it with permanent black ink. (Alternately, you could hand paint a design. Just be sure you keep the design small in scale.) Here I've used a Judikins rubber stamp featuring small alphabetical marks from an ancient language.
3. Allow the ink to dry thoroughly. In my humid climate this can take as long as an hour.
4. Cut a strip 3/4" wide from the painted paper, just as you did for the cardstock.
5. Trim off a piece that's just long enough to wrap around the base bead with little or no overlap. I try to cut precisely enough so the two ends butt snugly together with no gaps between them.
6. Glue the painted strip onto the base bead, keeping the edges aligned:

7. Wrap a small piece of tape around the toothpick just below the center. This creates a "stop" that keeps the bead from sliding down onto your fingers as you paint it. Place the bead on the toothpick:

8. Holding the bead upright, paint one end of the bead with Carbon Black acrylic paint using the 1/8" flat paintbrush. Let dry. Turn the bead over and paint the other end. Let dry.
9. Apply a couple of coats of clear acrylic varnish, allowing each coat to dry thoroughly between applications.

You now have a beautiful hand painted bead, ready to string!
Text and images ©2014 Lynn Edwards
No comments:
Post a Comment